Save your bottle caps! This project was really fun. The first step is removing the rubber seal that is inside the caps. I simply laid the cap on a hot plate for about 10 seconds and then used jewelry making pliers to pull it out. I did this process for the students because I didn't want anyone to get burnt but if you had enough pliers older kids could do it themselves. The possibilities for what goes on the inside is endless but we made ours a take on Wierd Al's song: Word Crimes. You need to make sure the glue dries over night or it will not turn out correctly. So, the students collaged into their bottle caps and then let them dry overnight. Then, the next day they poured Dimensional Magic (made by ModPodge) into the cap. Finally they hot glued a magnet on the back. The results are really cool!
Wednesday, March 25, 2015
Tuesday, March 3, 2015
Surreal Tunnel Books
Surreal Tunnel books
.JPG&container=blogger&gadget=a&rewriteMime=image%2F*)
My students were tasked with creating a surreal tunnel book and we spent a considerable amount of time in the planning process. Some people go to that off-the-wall surreal place effortlessly while others require a more involved process. The best tip I had for the kids who seemed to struggle with coming up with an idea was to establish a place (a desert, a landscape, a sky, outer space) and then add surreal elements into that place.
This is the process along with instructions on putting a tunnel book together:
1. I had my students start with a 2d sketch. It's okay if your idea changes or develops further in the process but I needed to see a general pencil sketch of their plan.
2. Next, paint a background, mine was 11x14.
3. Next, cut out frames (mine were 11x14) and create "props" or items which will be attached to those frames. My props are a combination of painted imagery (the tree) and edited and printed out images (butterflies, children, animals). You will also want to do a poster board backing behind your props so they stand up the right way. Also, paint your frames however you want.
4. Attach all props (tree, butterfly, children) to frames
This is what you will have:
Now, let's talk about how to attach the accordion sides. You will need:
1. 2 11x9 inch black papers
2. a white colored pencil
3. masking tape
4. your background
5. your 3 frames
1. Fold in half
Fold the top part back (sort of like how you fold back wings of a paper airplane).
Fold the bottom back.
You will have four sections. Fold each section in half and you may have to make a fold go the opposite way in order to have 8 sections that go back and forth like a fan. This is what it will look like:
Do that with both papers.
You should have 2 accordion folded black papers with 7 sides.

Now, attach the background to number 7 and number 14.
Next, tape 5 and 10.
Attach your back frame to 5 and 10.
Tape 3 and 12.
Attach your next frame to 3 and 12.
Tape 1 and 14.
Attach front layer to 1 and 14. You are finished!
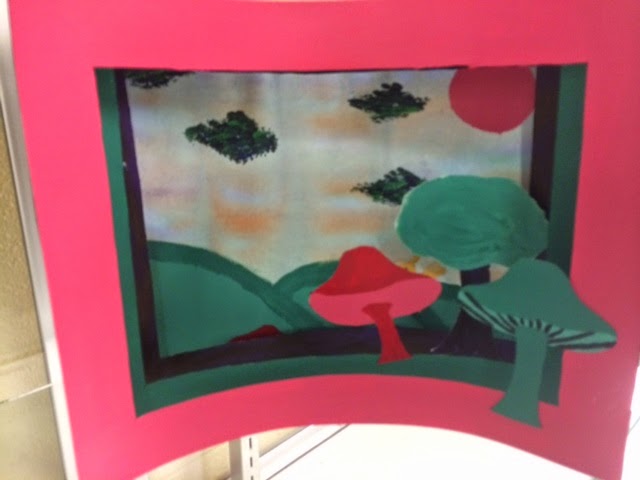
Student Examples:
Subscribe to:
Comments (Atom)
POPULAR POSTS
-
At the end of last school year I had the opportunity to plan for the upcoming year with my colleagues from the other two middle ...
-
I am very intrigued by the world of artist's trading cards. They are small 2.5" x 3.5" artworks which artists (in theory) tra...
-
My tried and true way to teach color theory in a meaningful and fun way I like to keep a healthy balance of teaching technique while st...
-
This year my sixth graders have spent a lot of time creating art that says something. We started with narrative self portraits and focused ...
-
This is the final digital project I will do in eighth grade Contemporary Art this year. We began this project with a discussion about ...
-
Surreal Tunnel books I teach an elective in 8th Grade called Contemporary Art. While I realize Surrealism was a movement that came...
-
My eighth grade contemporary art class creates three digital art projects. All three projects use Pixlr Editor which is great because its F...
-
Lately I have been really interested in the idea of art journalling. I think this would be a great way to start the year to really g...
-
I really like the idea of challenging my student's thinking when it comes to art. Most students think of building and creating ...
-
We had so much fun working with artist Michelle Stitzlein to create free standing sculptures to be displayed in our reading garden. ...


.JPG)


.jpg)


